The Benefits of Garage Flooring

The garage has long been more than just a place to park your car or store items you no longer need in the house. For many, the garage serves as a workshop, storage area, and even home gym. However, one often overlooked aspect of maintaining a garage is the flooring. High-quality garage flooring not only enhances the appearance of the space but also offers several functional benefits. Within this blog we will explore the advantages of installing garage flooring, the cost-effective option of DIY installation, and provide tips for laying down vinyl garage flooring.
Why Choose Garage Flooring
- Durability and Protection:
Garage floors go through a significant amount of wear and tear from vehicles, tools, and various chemicals. Standard concrete floors can crack, stain, and erode over time. Specialised garage flooring materials, such as epoxy, vinyl, or rubber, provide a protective layer that resists damage and extends the life of the floor.
- Safety:
A slippery garage floor can be hazardous. Many garage flooring options, particularly those designed for DIY installation, offer anti-slip properties. This feature reduces the risk of accidents, especially in environments where oil spills and water are common.
- Ease of Maintenance:
Garage floors are notorious for collecting dirt, oil stains, and other debris. High-quality garage flooring is designed to be easy to clean. Materials like vinyl are resistant to stains and can be quickly wiped or mopped, keeping the space neat with minimal effort.
- Aesthetic Appeal:
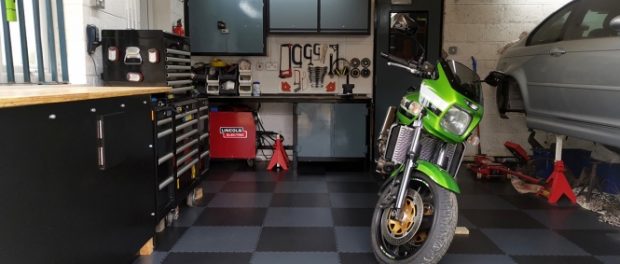
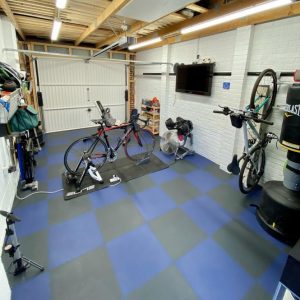
A well-finished garage floor can significantly improve the overall look of the space. Whether you prefer a sleek, polished look or a more rugged appearance, there are numerous styles and colours available to match your taste. This can transform an area into an inviting, functional part of your home.
- Enhanced Property Value:
Investing in garage flooring can also boost the resale value of your home. Potential buyers often appreciate the added durability and aesthetic appeal of a well-maintained garage. It signifies that the property has been well cared for, making it more attractive on the market.
Cost-Effective DIY
One of the most budget-friendly ways to upgrade your garage floor is by installing vinyl flooring yourself. Vinyl flooring is affordable, durable, and relatively easy to install, making it an excellent choice for homeowners looking to save money.
Why DIY Installation is Beneficial
Cost Savings:
Professional installation of garage flooring can be expensive, often doubling the cost of the materials themselves. By opting for a DIY approach, you can significantly reduce overall expenses. Vinyl flooring is particularly economical, and purchasing it in tiles or rolls allows for flexibility in coverage and design.
Personal Satisfaction:
Installing your own garage flooring can be a rewarding project. It offers a sense of accomplishment and gives you complete control over the customisation of your space. Plus, with the wide availability of instructional resources online, even those with minimal DIY experience can achieve professional-looking results.
Customisation:
When you install the flooring yourself, you have the freedom to design and layout the space exactly as you want. Whether it’s creating a unique pattern with vinyl tiles or choosing a specific colour scheme, DIY installation allows for personalised customisation that caters to your specific needs and preferences.
Top Tips for Installing Vinyl Garage Flooring
Preparation is Key
Before laying down vinyl flooring, ensure that the concrete base is clean, dry, and free of any cracks or holes. Any imperfections in the concrete can affect the appearance and longevity of the vinyl. Use a concrete patching compound for any repairs and thoroughly clean the floor to remove dust and debris.
Acclimate the Vinyl
Vinyl flooring should be acclimated to the garage environment before installation. Lay the vinyl out in the garage for at least 24 hours to allow it to adjust to the temperature and humidity levels. This helps prevent any expansion or contraction after installation.
Plan Your Layout
Measure your garage carefully and plan the layout of your vinyl flooring. If using tiles, determine the best starting point, usually in the centre of the room, to ensure an even and symmetrical installation. For vinyl rolls, plan to start from one end and work towards the exit to avoid trapping yourself.
Use the Right Adhesive
Ensure you use an adhesive specifically designed for vinyl flooring. Apply the adhesive evenly, following the manufacturer’s instructions, to avoid any lumps or gaps that could affect the finish and durability of the floor.
Rolling Out Air Bubbles
As you lay down the vinyl, use a heavy roller to smooth out any air bubbles and ensure good adhesion to the concrete. This step is crucial to prevent lifting and to maintain a smooth, professional finish.
Cutting with Precision
When cutting vinyl tiles or sheets to fit around edges and obstacles, use a sharp knife for clean, precise cuts. Measure twice to avoid mistakes and ensure that all pieces fit snugly together.
Sealing the Edges
After installation, seal the edges of the vinyl flooring with a suitable sealant to prevent moisture from seeping underneath. This step is particularly important in garages where water and other liquids are frequently present.
DIY Garage Flooring
Investing in garage flooring is a practical and aesthetically pleasing way to enhance one of the most functional areas of your home. By opting for a DIY installation of vinyl flooring, you can enjoy the benefits of a durable, easy-to-maintain, and attractive garage space without breaking the bank. With proper preparation and careful execution, your garage can become a clean, safe, and inviting part of your home, adding both value and enjoyment for years to come.


